Facebook Lead Ads are so much more than just a form because this kind of advertisement can help you drive objectives from the top of the funnel, such as Brand Awareness and Reach, to Customer Acquisition. Here we look into:
Understand the process and set up your facebook app.
Direct facebook ad leads using webhooks to your CRM.
Make your app to collect your page’s lead ads form submissions.
Generate never expiring access_tokens.
Add new code to your CRM to make a facebook webhook listener.
Collect the the leads in CRM and process it, send it via email, sms or any other ways.
Facebook ads redirect users to a form provided by facebook. These forms are created when the facebook ad is created. We can provide desired fields in the form. When a user submits the ad-form from facebook, there are two ways to collect the data. Either download the leads frequently from facebook or subscribe the page to a webhook. If you’ve a webhook subscription, you’ll get the lead instantly when the customer submits the leads ads form. Let us see how we can do this.
Prerequisites
1. Facebook Developers Account
2. FacebookAds Python SDK
3. Web Server setup for webhook listener.
Let’s start with the Facebook developers account. We need a facebook app to automate the process of lead submission. Only a developer's account can create the facebook app.
Set up your Facebook App
Create a new App by giving App name and your email address.
Under App Domains in Basic settings, include your webserver’s URL. You can also add localhost for testing purposes.
Go to the reviews tab and make your App public. Then go ahead and ask for Manage Pages and Ads Management permissions. There is a review process before granting these permissions. You will be notified by Facebook once it is complete or if there is more information required from you during the review.
Setup the webhook
We need to subscribe to the app for a particular event on facebook. Here we need to get access to the app when a leadgen event occurs.
Add a new product ‘webhooks’ from the ‘Add products’ section( didn’t see ? click on the + button on the left panel ) of the dashboard.
Subscribe for leadgen in the listed subscriptions for your page.
Give https://<yourcrmdomain.com>/facebookads-webhook (you can modify) as the callback url and verify_token.
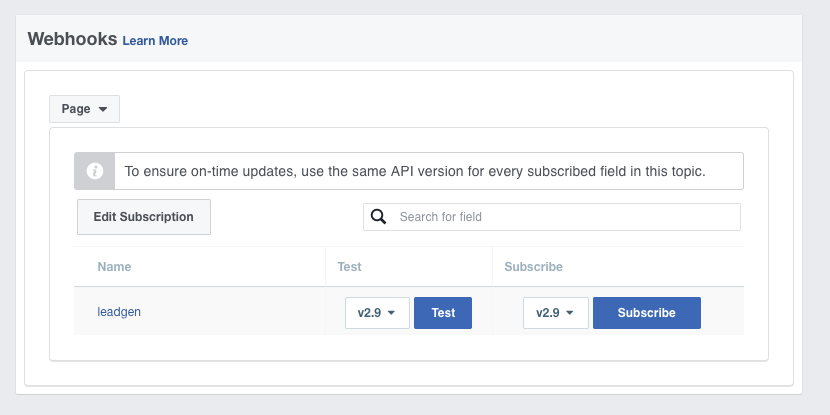
Set your webhook listener to receive the subscription test and it should return the verify token that we gave in the above step.
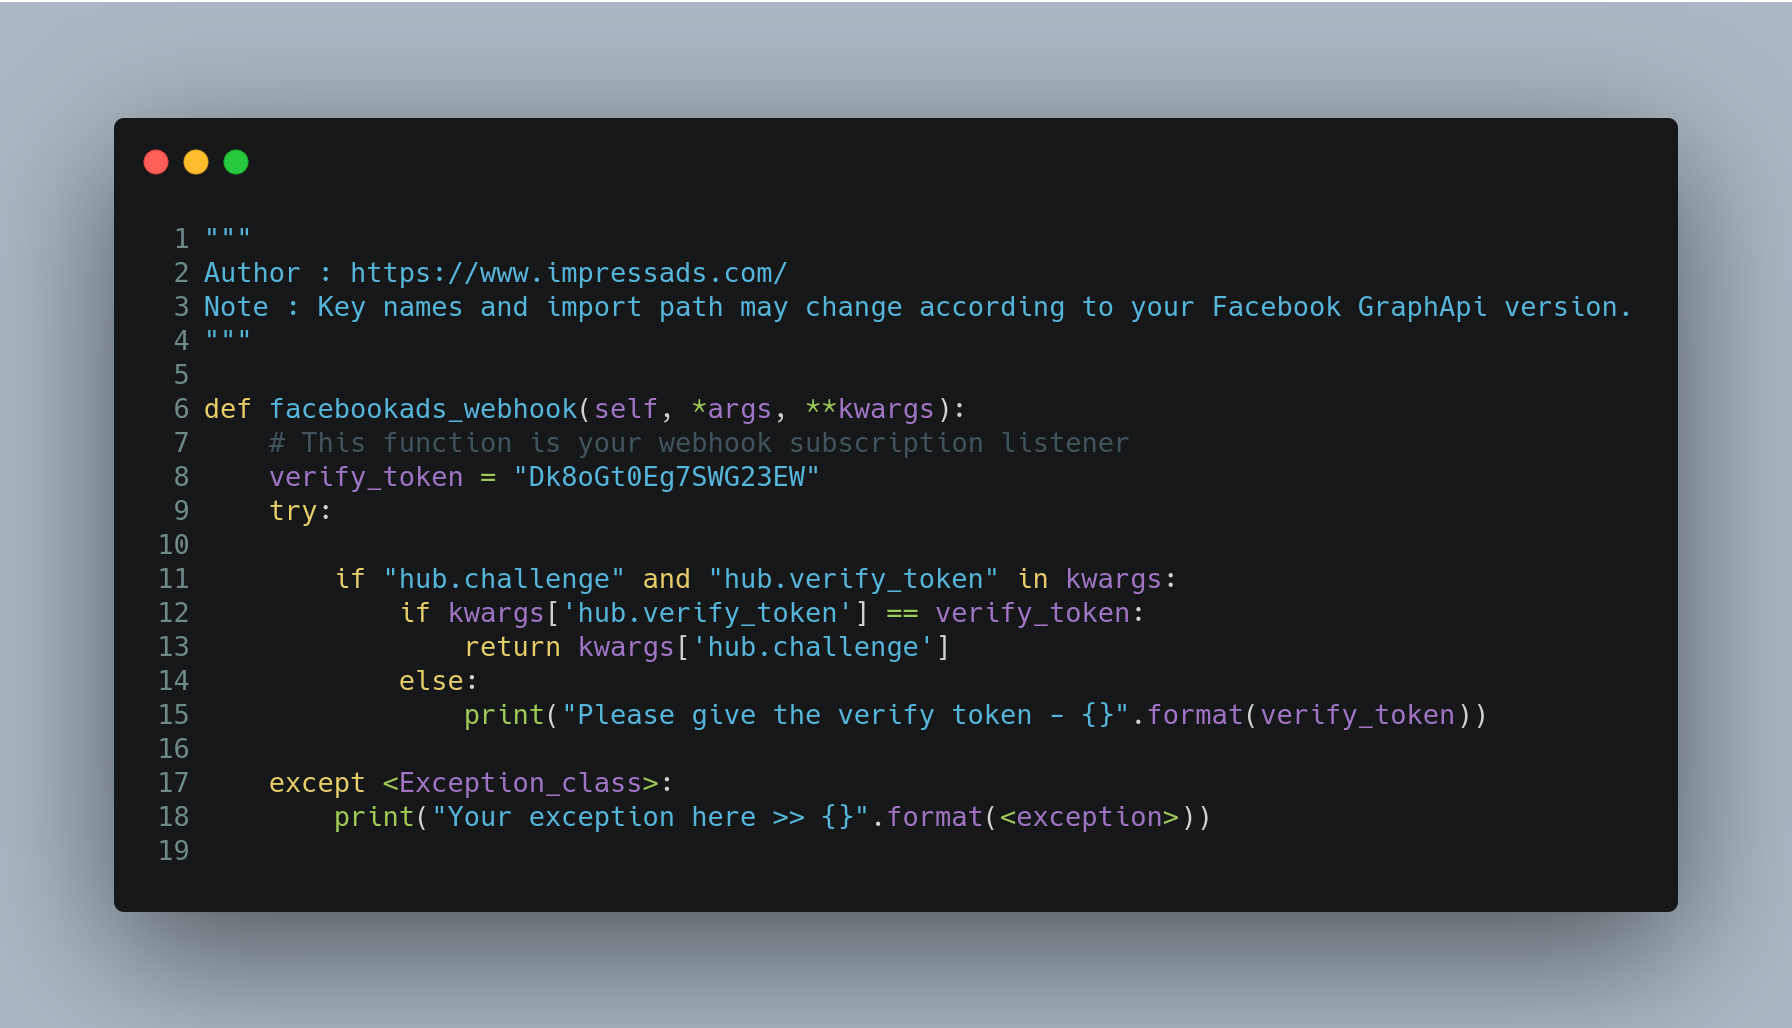
As you can see on the above code, If the challenge value sent by graph api is returned to the same url, the webhook subscription is successful.
Subscribe the App to the page
Each facebook page has different permissions. If you are an admin of a facebook page, you’ve to allow this app to access the page.
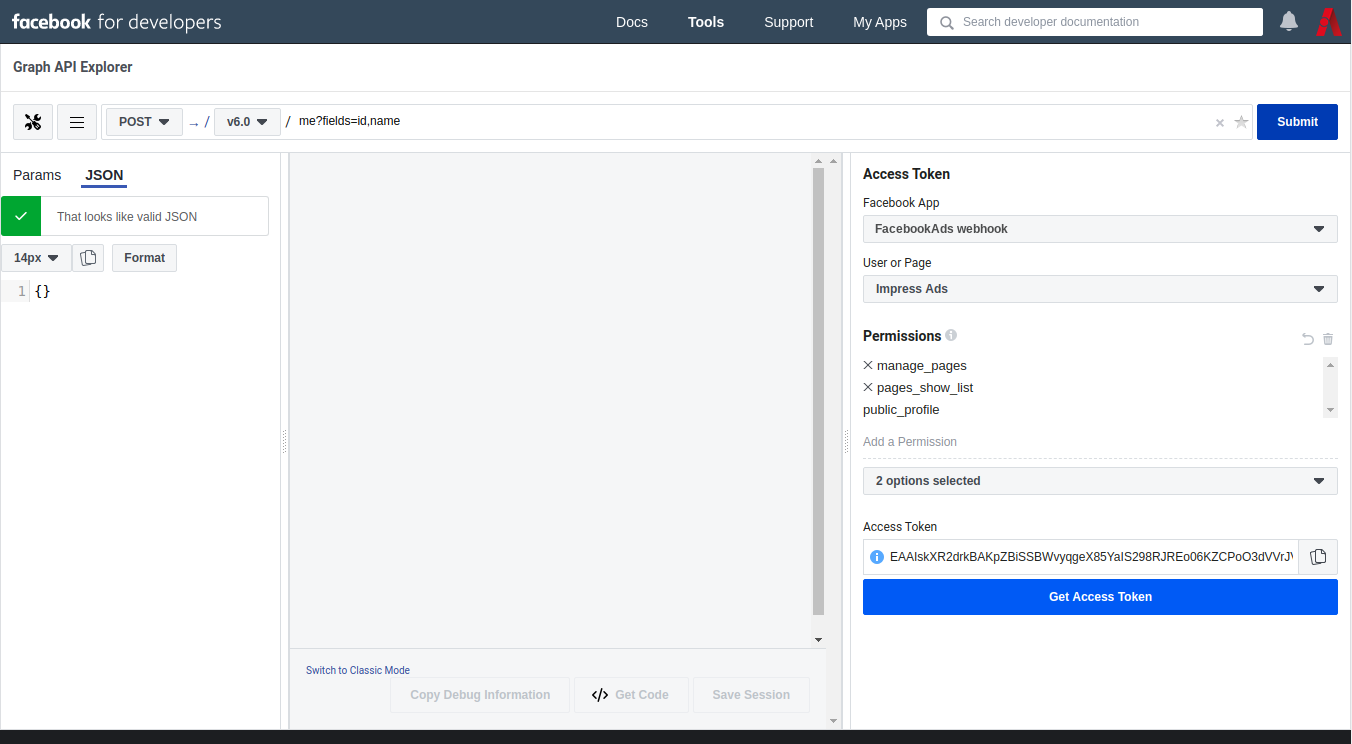
Go to the Graph API explorer tool page.( Facebook Graph API Explorer )
Get the user access token first with manage_pages and pages_show_list permissions. Then change it to the page that you wanted to get the access token. If you already have an access token, it will be displayed there. If not, click on get the access token.
While checking the validity of the access_token, it may expire soon. Our CRM needs a never expirable access_token.
Copy the user access_token from Graph API explorer.
Debug it with Access Token Debugger
You’ll get a little more long lived access_tokens. Press "Extend Access Token" and copy the generated long-lived user access token.
Go to Graph Api explorer and paste copied token into the "Access Token" field.
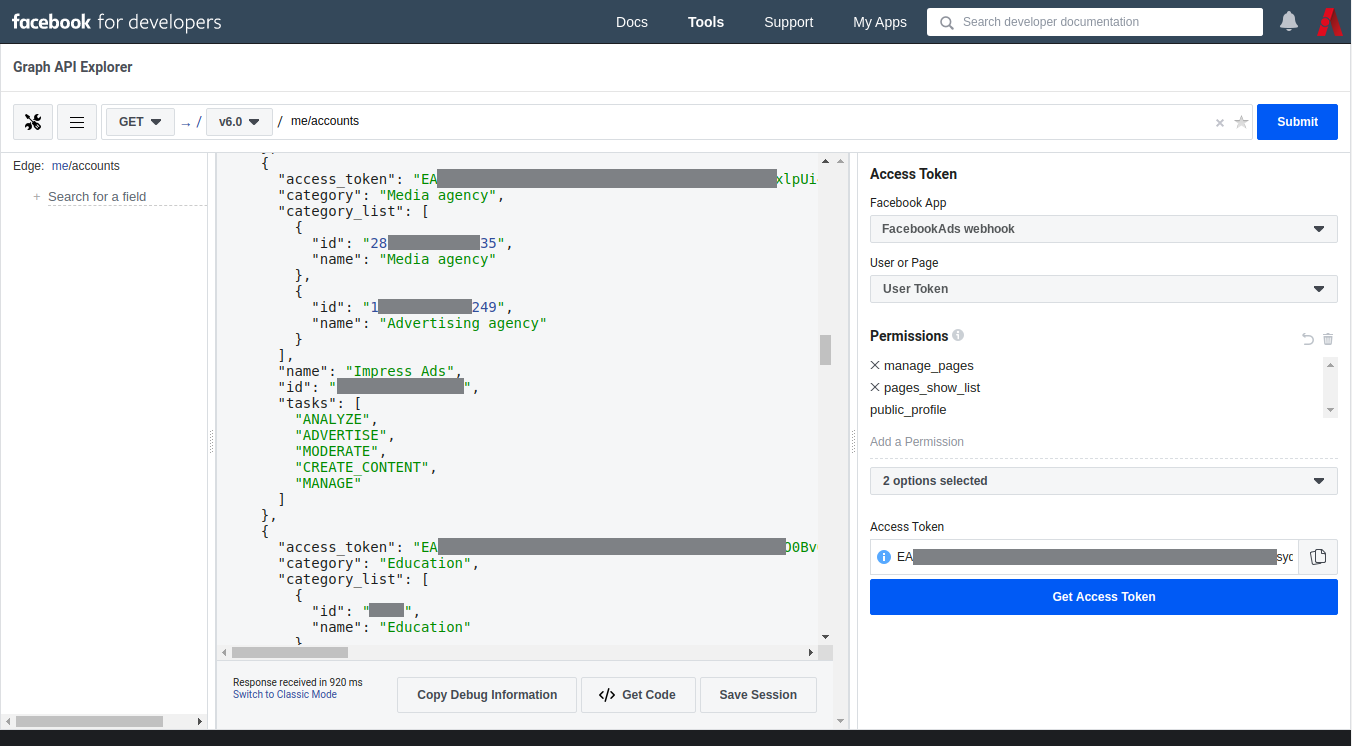
Make a GET request with "<PAGE_ID>?fields=access_token"
Find the permanent page access_token in the response (node "access_token")
Change the request submission type to POST, API version to your SDK version and change the remaining contents with your page_id and the keyword subscribed_apps. Send the request by clicking the submit button. < page_id >/subscribed_apps
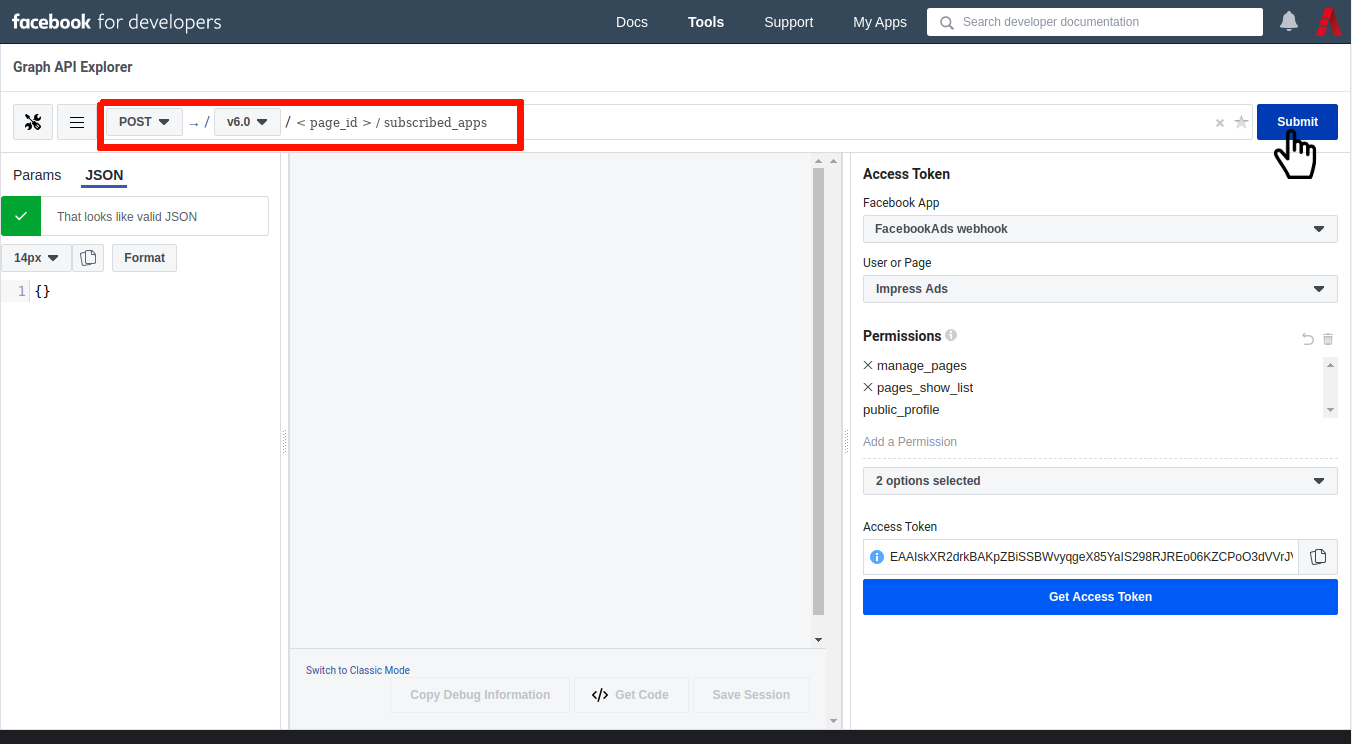
If you pass a json data with this request, you can see it there. If you didn’t send any extra parameters with the request, you’ll get a response { "success": true }. You’ll get an error if anything is missing in the request.
Note: You can do this request using any other ways like `curl`.
Setting up webhook listener for receiving lead
We’ve already created the webhook listener function. Now we need to change it to receive the payload coming from facebook api. Facebook is not sending the lead form data directly to the webhook callback url. A reference to the lead data in json format is given in the payload. Here is a sample payload:
{"object":"page","entry":[{"id":"9924851200109236","time":1580389437,"changes":[{"value":{"form_id":"939431753010352","leadgen_id":"554662192186140","created_time":1580389436,"page_id":"192002001092369"},"field":"leadgen"}]}]}
We need to get the lead data using the leadgen_id. For this, facebook is given their own API.
Download or clone the facebook ads python sdk from git.
git clone https://github.com/facebook/facebook-python-ads-sdk.gitInstall it to your project environment
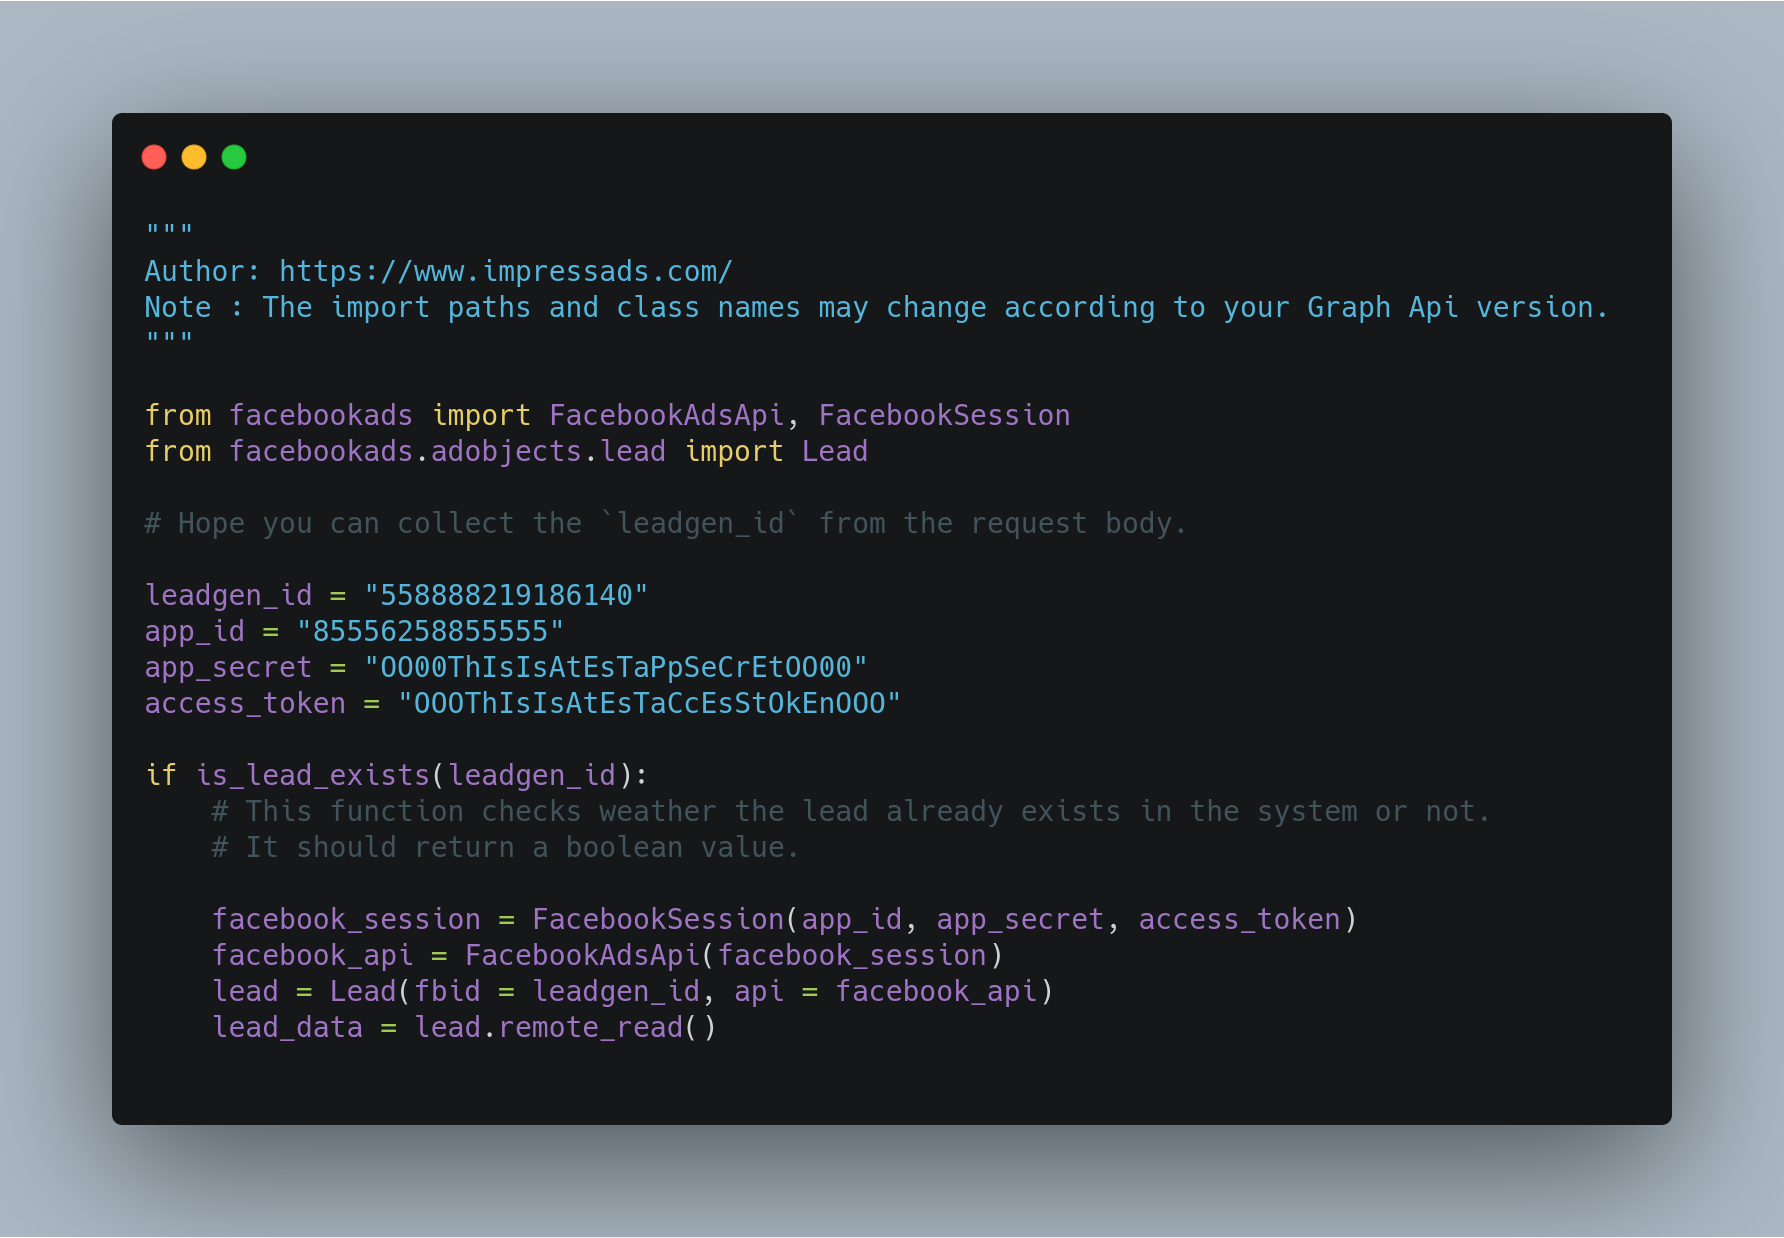
pip install facebookadsAdd the following code to your webhook listener function. Check the leadgen_id with your existing leads to avoid duplication of data.
Test the app subscription to page and lead delivery
Go to facebook’s lead ads testing tool page - Lead Ads RTU Debug Tool
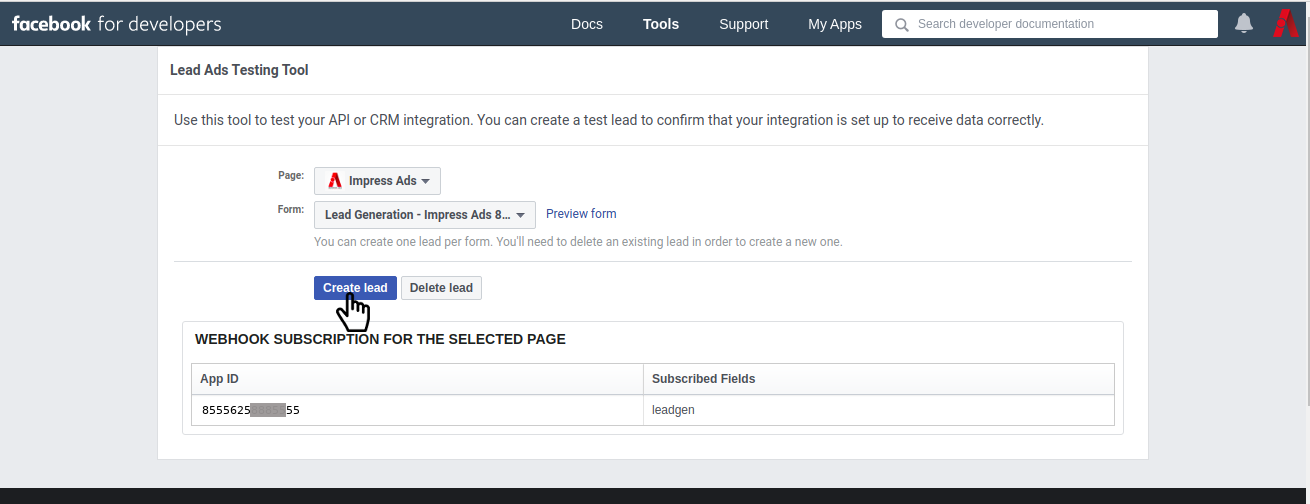
Select your page and form for lead testing.
Check the App ID and ‘leadgen’ in Subscribed Fields, under the heading ‘webhook subscription for the selected page’.
Click on the ‘create lead’ button to create an automated dummy lead data.
Track the status of the leadgen webhook post to your CRM by clicking on the ‘Track status’ button. Check the status and error messages when the status is shown. You can also see the dummy payload sent to the CRM there.
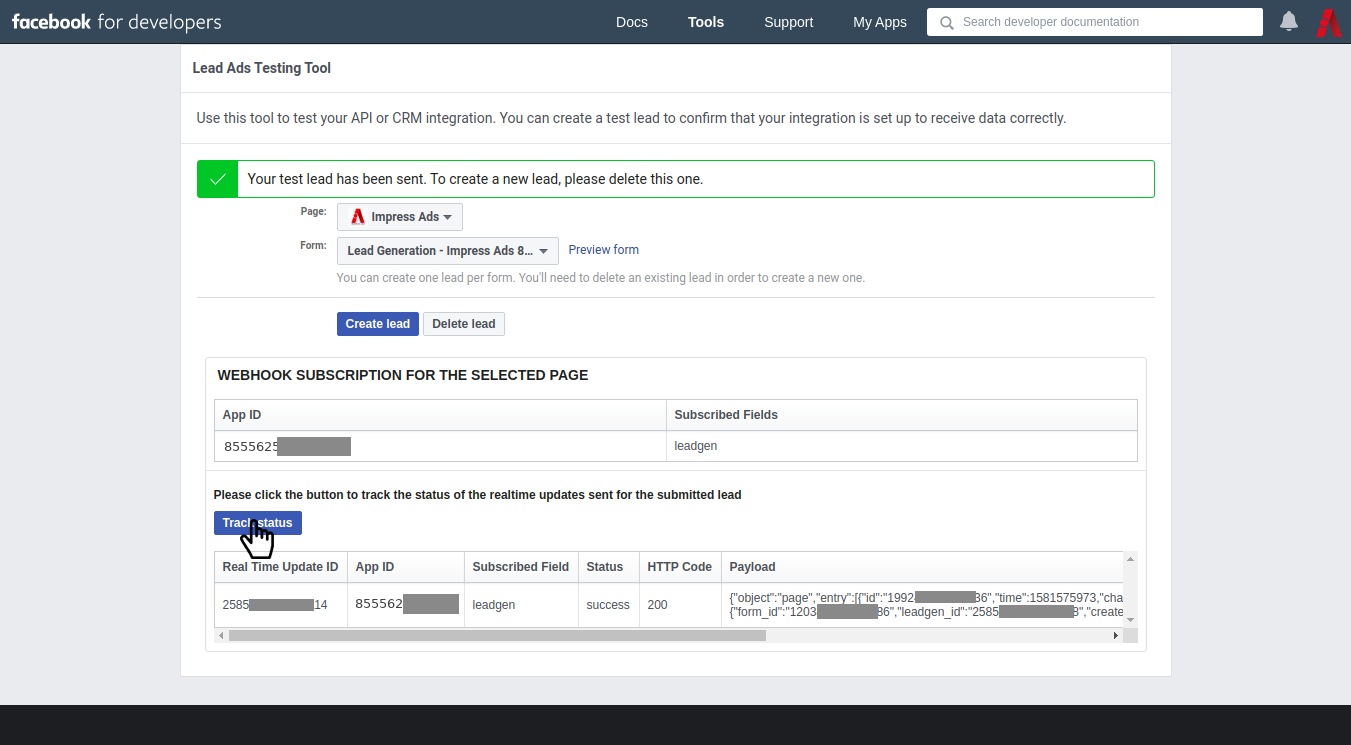
Click on the ‘Delete lead’ button to delete the submitted lead. It will clear the tracking feature and now you can submit another lead.
Now you’ve the form data on the variable `lead_data` in your CRM. Pass the data to extract the fields and send mail or sms with it. Do it on another thread, you may use more time the main thread.
ImpressAds 1.0,
First Floor, 5/35A3, Near Npol,
NGO Quarters - BMC Road,
Kakkanad, Kochi, Kerala 682021
+91 70122 32420
+91 80892 27170
ImpressAds 2.0,
GS8, XI/275 J-175,
Heavenly Plaza,
Padamugal,
Thrikkakara-682021
ImpressAds 3.0,
First floor,
Saketham,
Koodappulam P.O.,
Kottayam-686576
+91 89431 06346